Learn the keys to repurposing and distributing your blog so the right people read your content
Welcome to How To Write A Blog (Part Three): Sharing Your Great Ideas And Content.
In Part One, you learned how to generate strong ideas, define your purpose, and research your blog. You became an Idea Wizard.
In Part Two, you learned how to outline and write your blog without stress and panic. You entered Content Wizard mode.
Now it’s time to make your great ideas and content shine. This final section walks you through repurposing your content into different formats and sharing it with the world.
Because if no one sees your blog, it can’t do its job. And your words? They deserve to be seen.
Let’s finish strong. Prepare to become a Content Strategy Wizard.
This is a three-part series on How To Write A Blog. I recommend you read these in order:
- Start Here – How To Write A Blog (Part One): Get Clear On What You’re Writing
Learn how to find a blog idea, define your blog purpose, and research your blog. - Get Comfy – How To Write A Blog (Part Two): Becoming A Content Wizard
Learn a stress-free process for outlining, writing, and editing your blog. - Finish Strong – How To Write A Blog (Part Three): Share Your Great Ideas And Content
Learn the keys to repurposing and distributing your blog so the right people read it.
6. Repurposing and Distribution – The Sixth Step In How To Write A Blog
The last step in how to write a blog is creating a repurposing and distribution strategy for each blog you write.
Your blog is not a one-and-done piece of content.
After publishing it on your website the next step is repurposing your blog into different types of content that you can distribute and share on social media, newsletters, industry websites, and as different content types for your website.
How you repurpose your content depends on who your audience is, where they are, and the type of blog content you created.
Consider repurposing your blog into:
• Text-based content for LinkedIn and Facebook. These posts give readers helpful and actionable information without forcing them to click and read your blog. This type of content is called zero-click content.
While the goal isn’t to drive traffic to your blog and website, it does help with brand authority, prove expertise, build trust and authority, and encourage people to learn more about you.
Include a link to your blog in the comment section of the post.
• Slides, images, and PDFs. Use a tool like Canva to create these.
Each slide or image should share a useful tip, quote, statistic, or how-to pulled from your blog. For example, if your blog includes a step-by-step process, turn it into a series of slides.
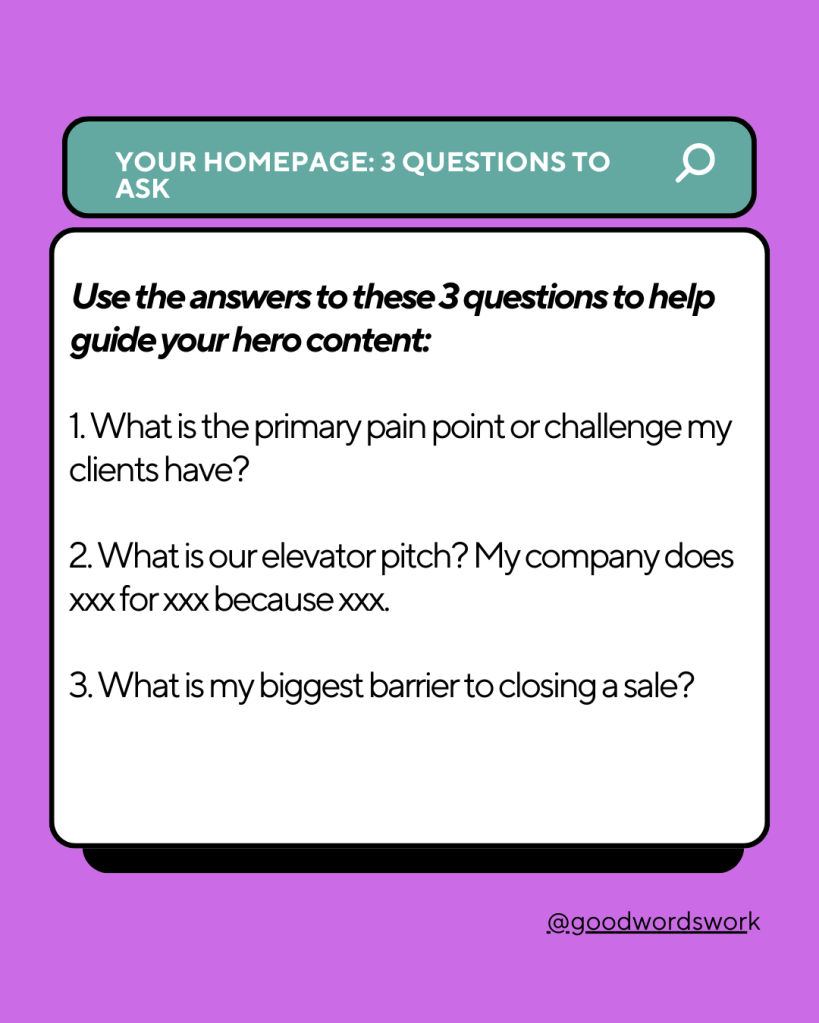
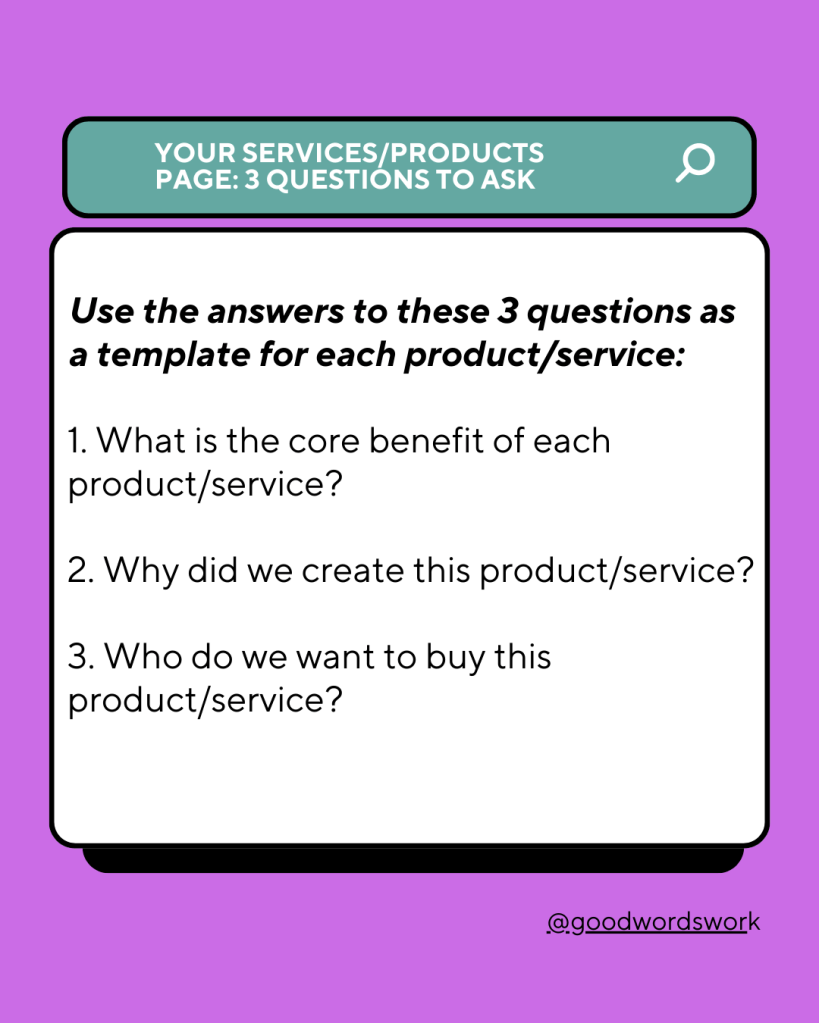
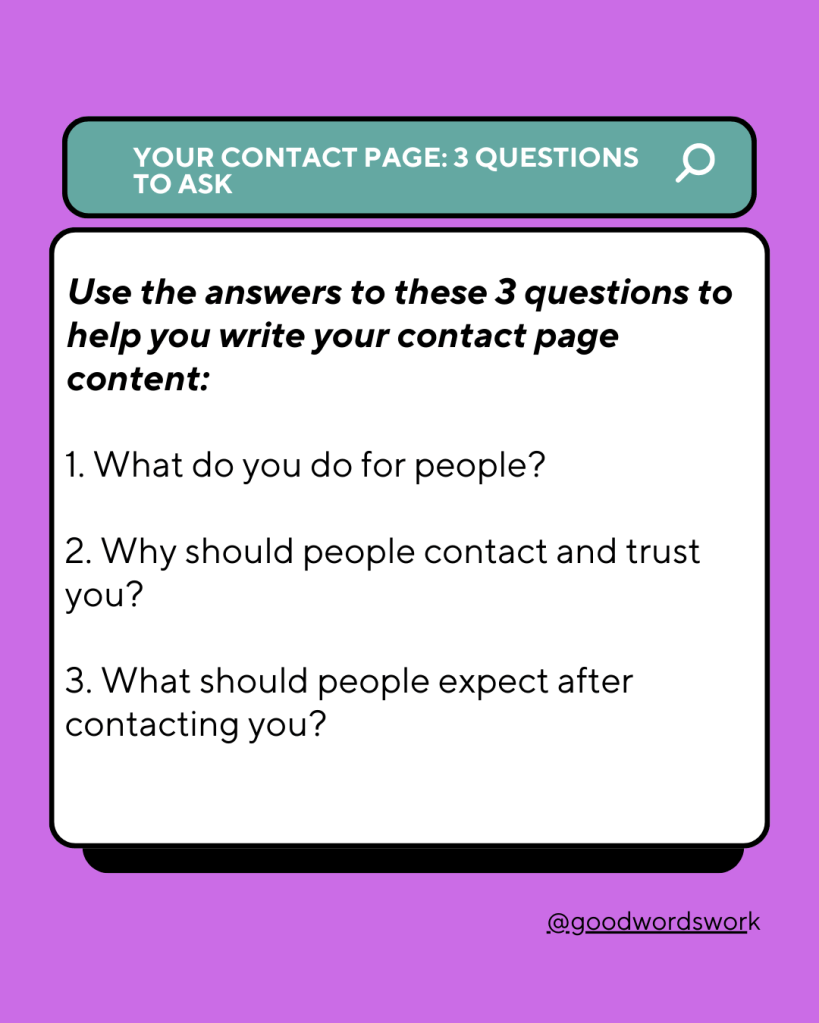
Here’s what I did with my blog titled Optimize Your Website: Learn What Content You Need On Every Key Page:

I also created a PDF slide deck that I shared on LinkedIn and shared as images on Instagram and Facebook.
• Create a YouTube video and shorts. These can be shared on your YouTube channel and social media.
You can choose to simply record yourself reading the blog and include captions and then create shorts based on the different sections in your blog.
Remember to share these videos on LinkedIn, Instagram, Facebook, and TikTok (if your audience is there).
• Email newsletter or Substack content. Write a summary or highlight a key point from your blog in your email newsletter or Substack and include a link to your blog.
You want to compel people to click the link and read your full blog. Give people a reason to want to learn and read more from you.
You may want to include some of the images you created with Canva in your email newsletter or Substack along with a link to your blog.
• Shorter articles, FAQs, and website content. The options are endless here.
You want to look for ways to repackage your blog into as many pieces of content as possible.
How can you repurpose your blog into an FAQ-style blog post?
Is there a how to section that can stand on its own with a short introduction and conclusion?
Can any of the content be reused on your website? Maybe there are statistics and quotes that can be turned into an infographic that can be used on your product or service page.
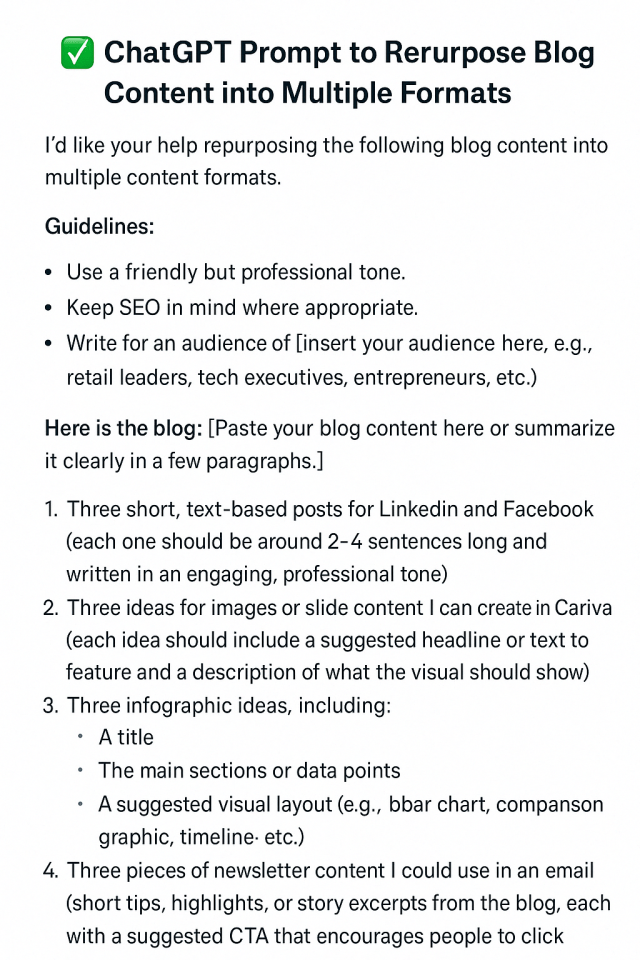
Here’s a ChatGPT prompt that you can use to help you repurpose your blog content. Feel free to edit this to match your audience and target platforms:
Now that you have your repurposed content, create a schedule to distribute this content on social media, in your email newsletter, on YouTube, and on your website.
The great thing is you can repost and repurpose this content again and again.
One blog should turn into multiple pieces of content. Write, repurpose, reuse, distribute, repeat.
TL;DR How To Write A Blog In 6 Steps
When you’re stuck, swamped, don’t want to read this entire blog series, or feeling a bit frantic about how to write a blog, use these 6 steps to help you write your blog:
- Start With An Idea
Think about the problems and challenges your products, services, and company solves.
Think about the questions your sales and product team is asked during client calls.
Talk to your SMEs about the questions they’re thinking about and trying to answer.
Use Perplexity and Google to research content gaps, what people are searching for, and the questions people are asking.
Take a breath, go for a walk, let your brain work its magic. Write down all the ideas that fill your brain. - Define Your Blog’s Purpose
What do you want people to do after reading the blog?
What problems does this blog solve?
What is the point of this blog?
How does this blog help people?
For each blog idea, fill in the blanks in this blog purpose statement:
This blog does <xxxx> for our readers, it <solves problems, answers questions, educates on our company, products, services, provokes with a unique perspective (choose the appropriate options)> and after reading this blog, we want readers to <contact us, sign up for a webinar, subscribe to our newsletter, watch our videos, xxxx, xxxx>. - Collect Expertise, Research, and Knowledge
Ask Google, Perplexity, and your favourite LLMs about your blog idea.
Start with a foundational question that is tied to the purpose of your blog. And then keep typing, reading, asking, and digging.
Now it’s time to talk to your human experts. Set up a call with your SMEs or send them a blog brief for them to complete.
The trick with this research phase is knowing when to stop researching. It’s easy to get caught up in research as a form of writing procrastination.
Give yourself a hard deadline for this step.
You are an Idea Wizard now. - Write Your Blog Outline
Never ever write blind. You need an outline.
Review your blog purpose statement. Read your research notes.
Create the structure for your blog with placeholder headings: Introduction, Blah Blah Section 1, Blah Blah Section 2, etc, through to the Conclusion.
Write some notes, ideas, paragraphs in each section to capture what you want to say.
Copy applicable research and links to each section.
I recommend doing this in bulk for your 3- or 6-month blog plan. All your planning is done in advance, making it much easier to sit down and write on blog writing day. - Sit Back, Relax, And Write Your Blog
This is the fun part! You’ve done the research, pushed your brain, and now it’s time to let everything flow out of your fingers and onto the screen.
You have got this. I believe in you.
Schedule your blog writing time in your calendar. Set aside an entire day to write.
Blog writing is a creative act. Pressure and creativity typically don’t fit together.
Your brain needs to be clear, confident, and ready.
Create a new Google, Word, or Notes file and open your research file.
Read your outline, click the links, do any extra research. Get up, put on your shoes and go for a walk or make some tea.
Sit down. And let the magic happen. Fill out each section in your outline. Give yourself all the time you need.
Section by section. Boom! You’re done. You did it.
(Don’t forget you need to edit your blog.)
Welcome to the Content Wizard club. - Get Your Blog Out There So People Can Learn From You
Blog writing is not a one-and-done act. You need to shout about your blog across all platforms and corners of the Internet.
After publishing your blog on your website and writing the obvious LinkedIn post, it’s time to get super creative with your brilliant words.
Your blog is the starting point for slides, images, infographics, YouTube videos and shorts, text-based posts, newsletters, website content, and whatever else you can think of.
Think about where your audience is and how they like to consume content.
The key here is putting your ideas and thoughts in front of people in the right formats.
This helps you build awareness about your company, product, services, ideas, and thought leadership.
Congratulations on graduating to Content Strategy Wizard mode.
There is a lot of information in this three-part blog series. It can feel like a lot.
But if you take it step-by-step, you can be a confident blog writer.
The great thing about these six blog-writing steps is that they work for anything—website copy, your Substack, a course, a book—whatever you need to write.
Everything starts with an idea, establishing purpose (goals), doing the research, planning, sitting down and writing, and then publishing and sharing.
I’m here to talk about your words, your website, and how I can help your clients find and trust you.
To hire me to write for you–send me an email. I’m always happy to help you out.
